
While producing a realistically growing soy plant for a client, I ran into an interesting and unexpected snag with the 3D Studio max Morpher. Here's what it is and how I overcame it.
Here's an overview of the process...
While growing the soy pods, I wanted to be able to adjust the texture age along with the shape change. Since this will make adjustments and re-timing way easier and more predictable. Especially since material editor keyframes are very tucked away in max. To do this, here's what has to happen:
- Create a mesh to be animated with morphs.
- Create textures to correlate to the stages of morphing.
- Link up the morph amount to the texture amounts, automatically making the textures change with the morphs.
Here's where I hit the snag....
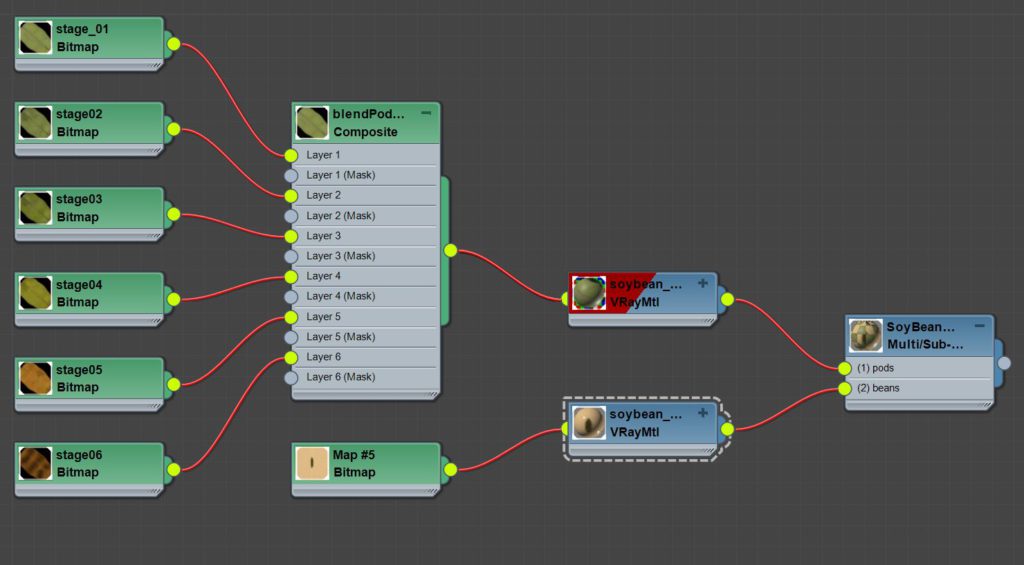
To start, I made the 6 meshes and then material with textures of the pod transforming over 6 stages of life. Below is the clean composite texture used on the soy bean.
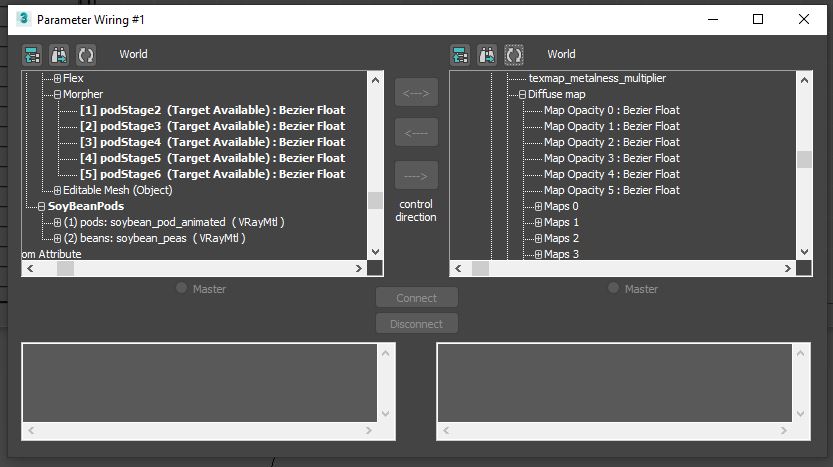
Next, I wanted to use the parameters to link up the Morpher modifiers amount on the geometry wire (left side) to the Composite Texture opacity amount (right side). You can see below, the Diffuse slot, even with the Composite texture plugged into it, does not have any connectable wire parameters.
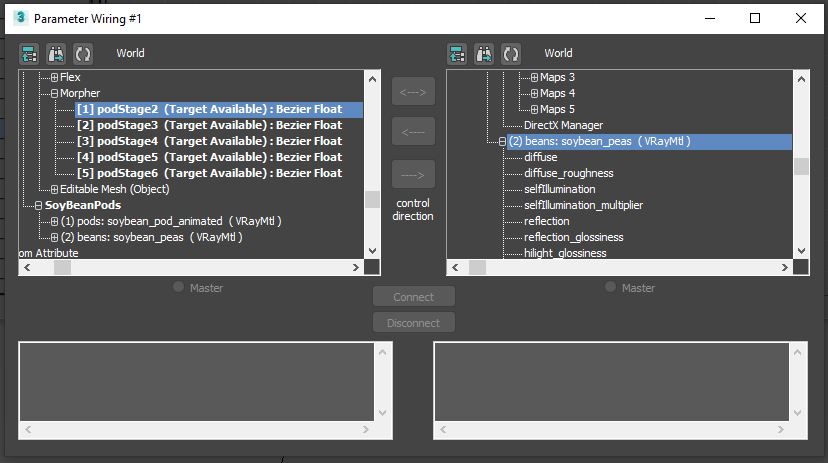
Here's the issue....
The reason the wire parameter doesn't work is because there is no "keyable parameter" by default. There is a small and strange thing in Max behind the curtain here....
SOME PARAMETERS DO NOT HAVE ACCESSIBLE VALUES UNTIL THEY ARE ANIMATED BECAUSE THE CONTROLLER TYPE DOESN'T EXIST UNTIL CALLED UPON.
On the back end, it is a dynamic write, so after they are animated will then create the variable needed. This is the loophole that can get you what you want. It is like this because it helps Max with playback performance... as the animation evaluation does not need to account for unused parameters. So essentially, the scene isn't bogged down with animation controllers that will never be used. I was completely unaware of this, but it is quite important.
Here's the trick....
- Select the Composite Texture in the slate or material editor.
- Turn Animate on and Go to frame 1.
- Change the value of the Opacity for each of your composite textures, this will set a key for each of them. This will create an active controller on those properties.
- Then you can delete the keyframes if you want.
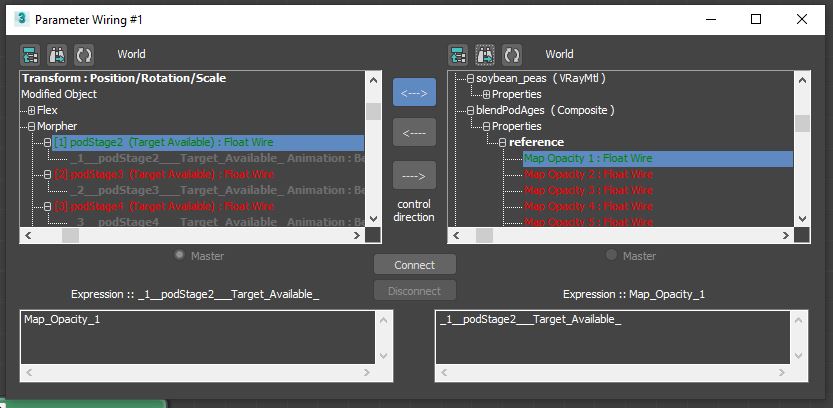
- Now open the Parameter Dialogue and navigate to make your connection and it will be magically available.
Above: After adding a single keyframe to the Composite Texture Blend Opacity, the values become connectable. Below: Properly linked up and ready to animate more easily.
Conclusion...
Now, I can simple animate the age of my bean with the single Morpher sliders or with wired Manipulators and all will follow properly. Making it all so much easier to adjust time and get things right for the shots required. I'll try to add a link to the live content once it is made public so you can see where/how this was used.
I am sure this process will affect other things that annoyingly didn't show up inside the wire parameter dialogue. I look forward to trying this trick out on those next. That's all for now. Go make things!
No Comments.